> ## Documentation Index
> Fetch the complete documentation index at: https://docs.hasmcp.com/llms.txt
> Use this file to discover all available pages before exploring further.
# Connect HasMCP MCP Servers to Claude Web
> How to connect HasMCP remote MCP servers to the Claude.AI web application using custom connectors.
# Connecting to Claude Web
You can connect your HasMCP remote MCP servers to the Claude.AI web application using the built-in **Connectors** feature. Once connected, Claude can call your tools and APIs directly from any conversation in the browser.
## Prerequisites
* A HasMCP account with at least one MCP server configured
* A Claude.AI account (Pro or Team plan required for custom connectors)
## Setup Instructions
In your HasMCP dashboard, navigate to your **MCP Server** and click **Generate Token** to create a secure access token. Copy the token — you will need it in the next step.
In the Claude.AI web app, click your profile icon in the top-right corner and select **Settings**. Then click **Connectors** in the left sidebar.
You will see a list of available connectors along with an **Add custom connector** button.
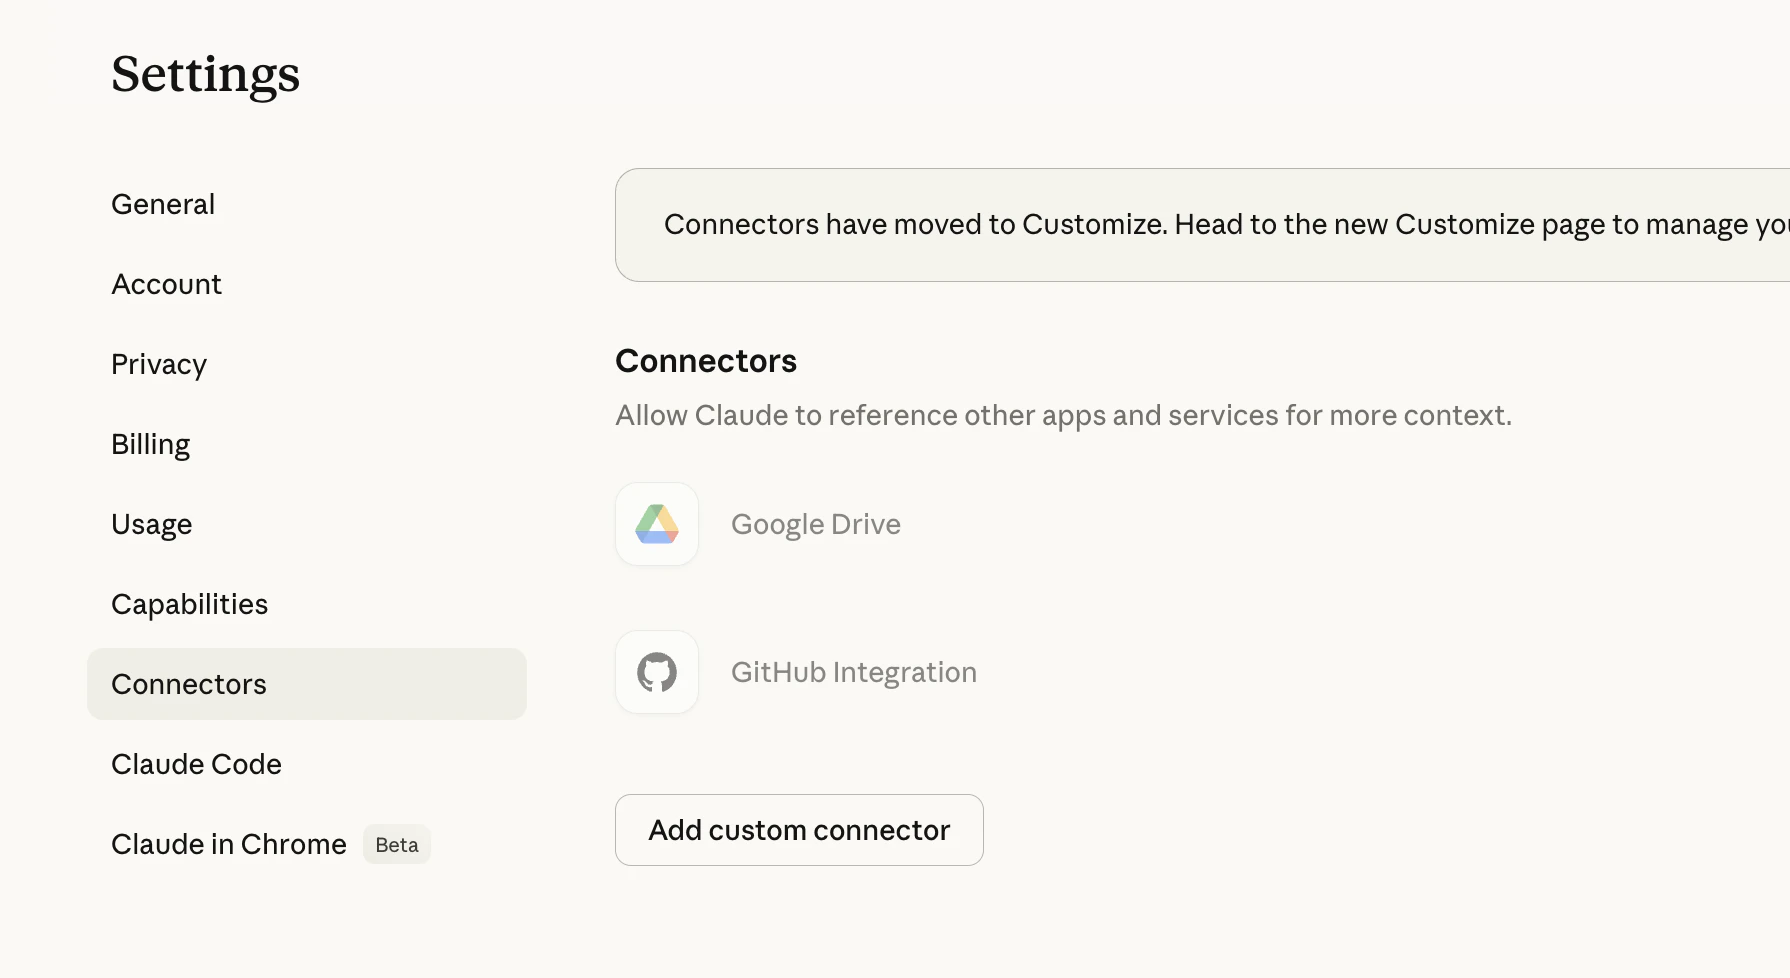 Click **Add custom connector**. In the dialog that appears, enter your HasMCP server URL with your token appended as a query parameter:
```text theme={null}
https://.mcp.hasmcp.com/mcp?token=
```
Replace `` with your server's subdomain and `` with the token you generated in Step 1.
Click **Add custom connector**. In the dialog that appears, enter your HasMCP server URL with your token appended as a query parameter:
```text theme={null}
https://.mcp.hasmcp.com/mcp?token=
```
Replace `` with your server's subdomain and `` with the token you generated in Step 1.
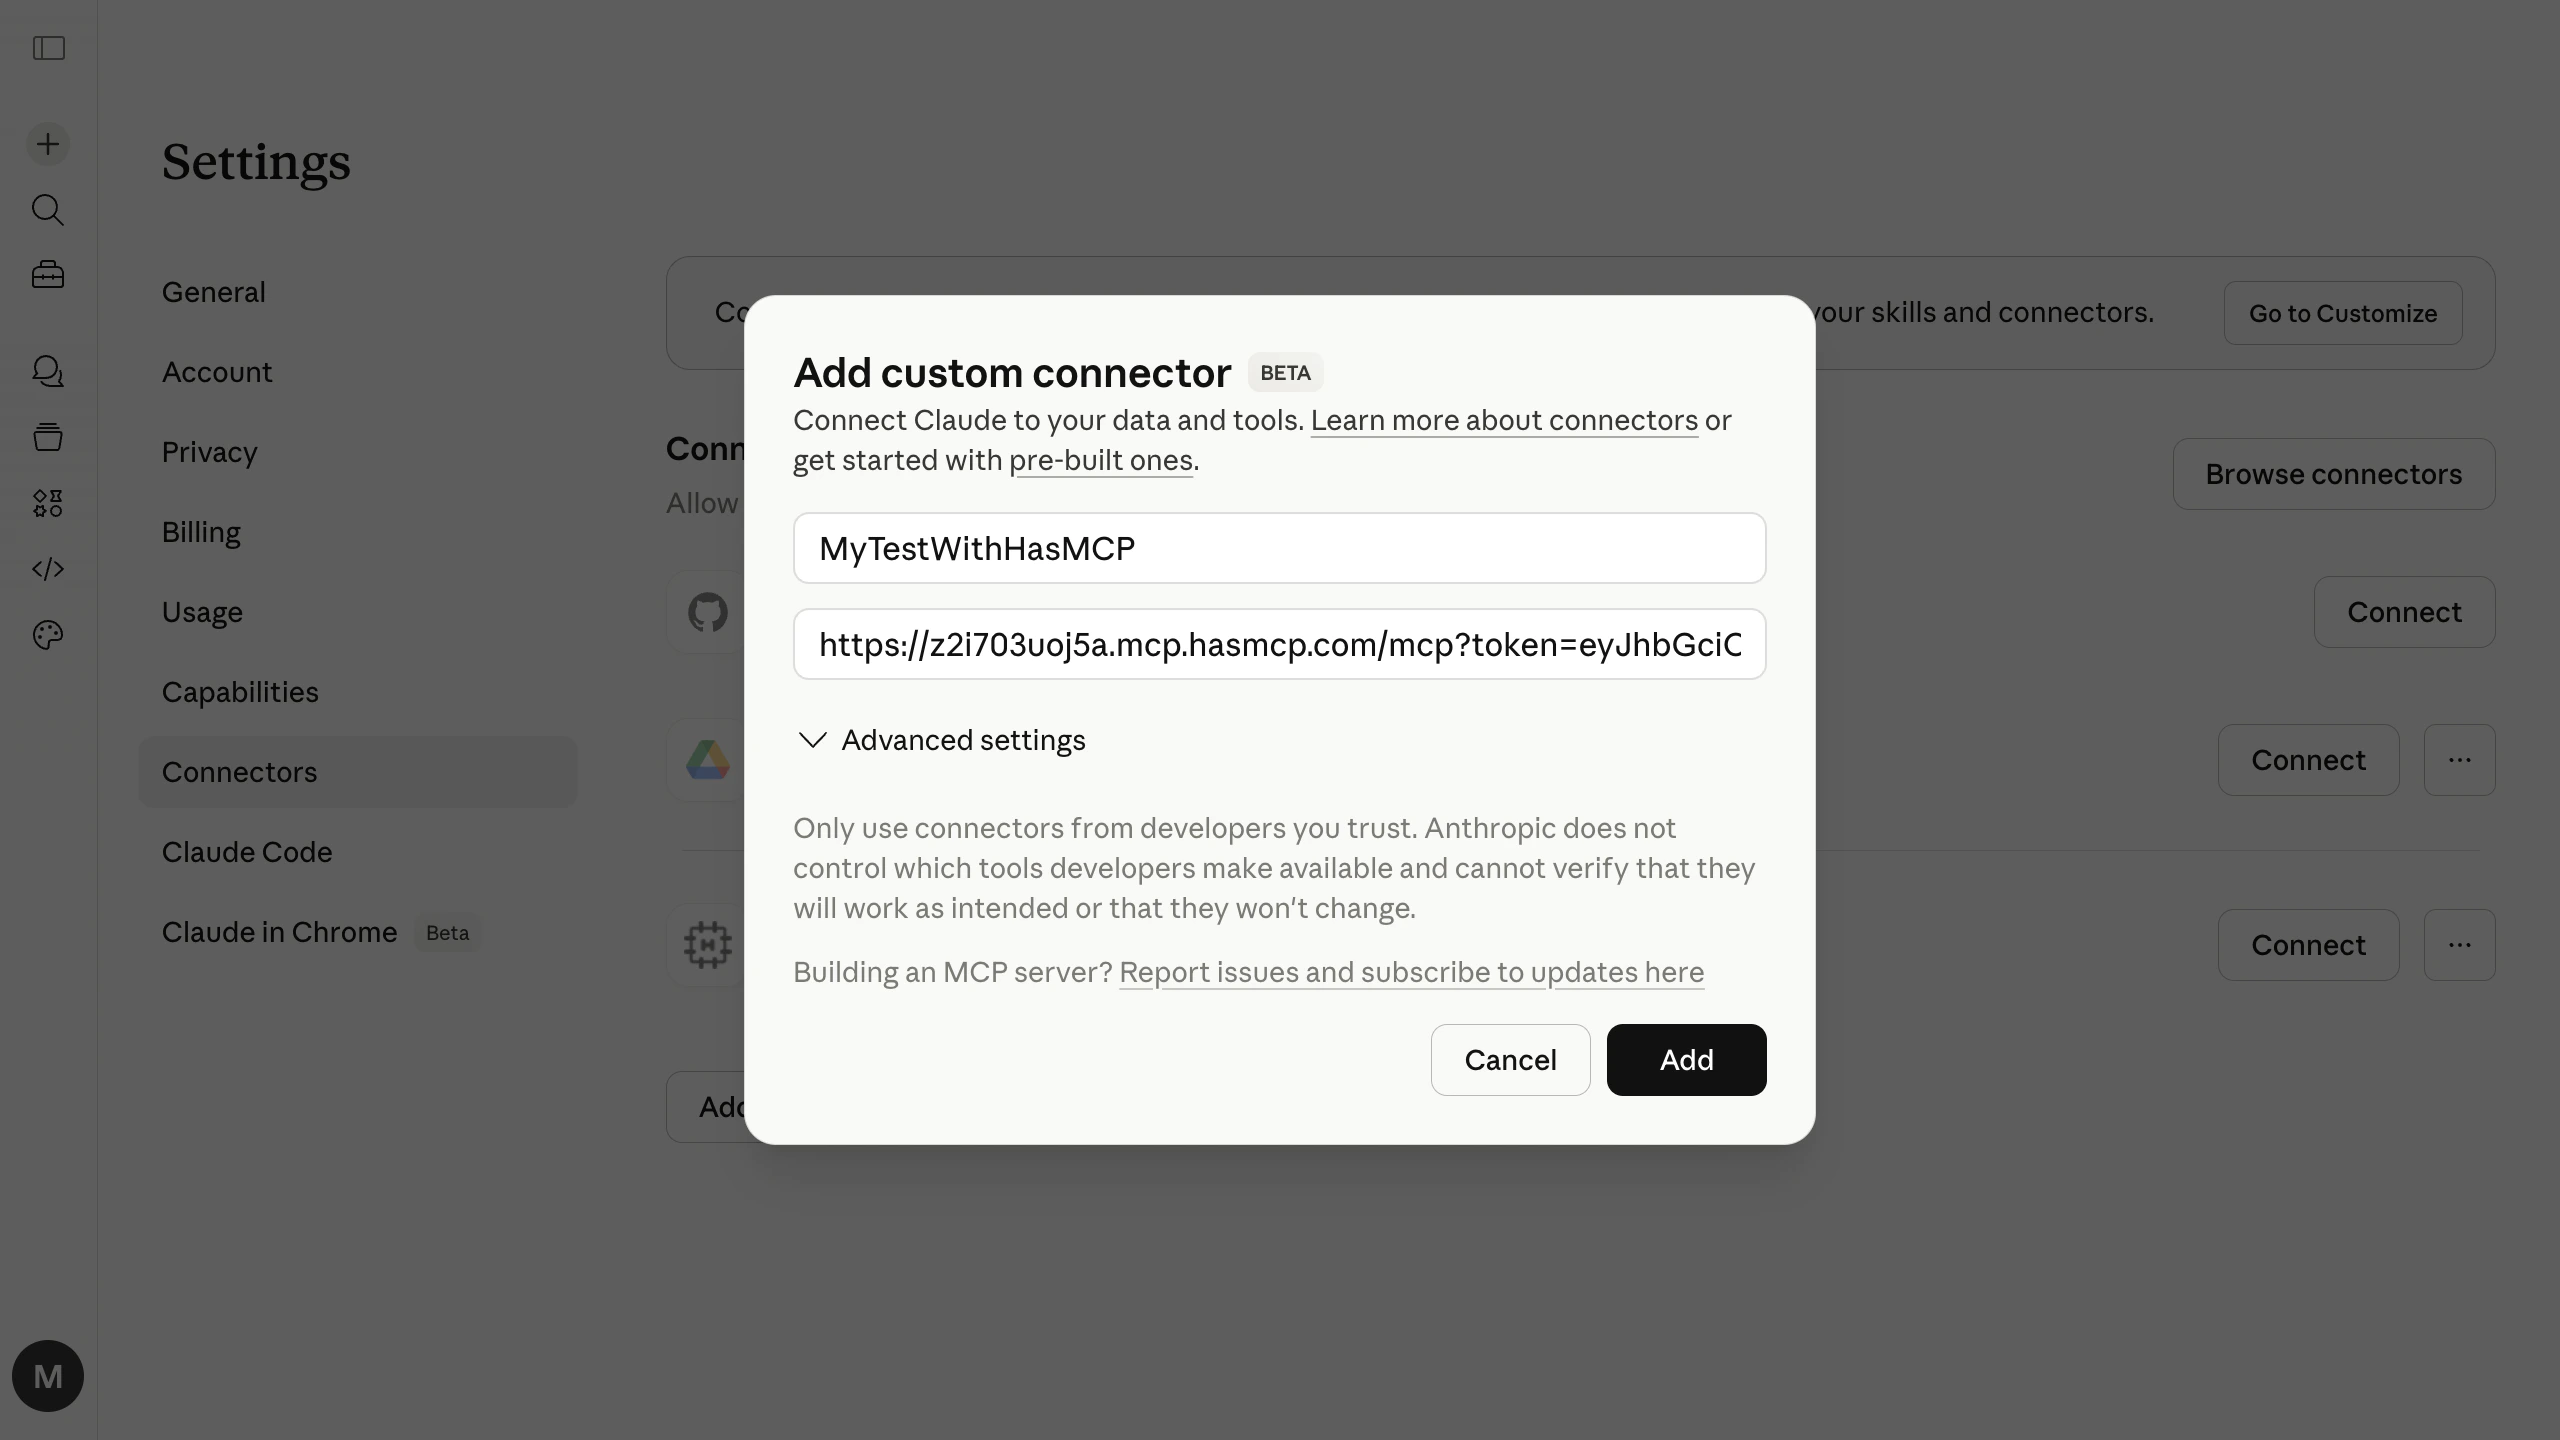 Click **Add** to save the connector.
## Why Use Query String Tokens?
The `?token=<>` query string approach is recommended for Claude.AI connectors because:
* **Compatibility**: It bypasses potential header-stripping issues in the Claude connector interface.
* **Simplicity**: You do not need to configure a separate API key authentication step.
* **Security**: The token is still validated by HasMCP before any tools are executed.
## Troubleshooting
Ensure the URL includes the full subdomain and the `?token=` query parameter. The URL must start with `https://`.
Ensure there are no spaces or extra characters in the `?token=` value. Regenerate the token in the HasMCP dashboard if needed.
Custom connectors require a Claude Pro or Team subscription. Free accounts may not see the custom connector option.
After adding the connector, start a new conversation. Look for the tools icon in the message input area to confirm the server is connected and tools are available.
## Related Reading
* [Generate a Server Token](/kb/generate-server-token)
* [Connect HasMCP MCP Servers to Claude Desktop](/ai-tools/claude-desktop)
Click **Add** to save the connector.
## Why Use Query String Tokens?
The `?token=<>` query string approach is recommended for Claude.AI connectors because:
* **Compatibility**: It bypasses potential header-stripping issues in the Claude connector interface.
* **Simplicity**: You do not need to configure a separate API key authentication step.
* **Security**: The token is still validated by HasMCP before any tools are executed.
## Troubleshooting
Ensure the URL includes the full subdomain and the `?token=` query parameter. The URL must start with `https://`.
Ensure there are no spaces or extra characters in the `?token=` value. Regenerate the token in the HasMCP dashboard if needed.
Custom connectors require a Claude Pro or Team subscription. Free accounts may not see the custom connector option.
After adding the connector, start a new conversation. Look for the tools icon in the message input area to confirm the server is connected and tools are available.
## Related Reading
* [Generate a Server Token](/kb/generate-server-token)
* [Connect HasMCP MCP Servers to Claude Desktop](/ai-tools/claude-desktop)